How to Make a Putz House With Vintage Christmas Charm
This article gently guides you through making charming vintage-style putz houses that spark the magic of old-fashioned Christmases just like the ones that warm your heart every year.
- Learn how to craft a nostalgic putz house using vintage-inspired materials like soft inviting paints and sparkling mica snow that capture authentic old-world charm.
- Follow step-by-step tips to build sturdy miniature houses with classic steep roofs and wonderfully weathered textures that feel like they have stood the test of time.
- Discover clever ways to give your putz house a perfectly aged look using tea-stained paper and timeless holiday motifs that never go out of style.
- Find plenty of ideas for customizing your putz house with themed miniatures and natural touches that add a warm personal flair to your holiday display making it truly yours.
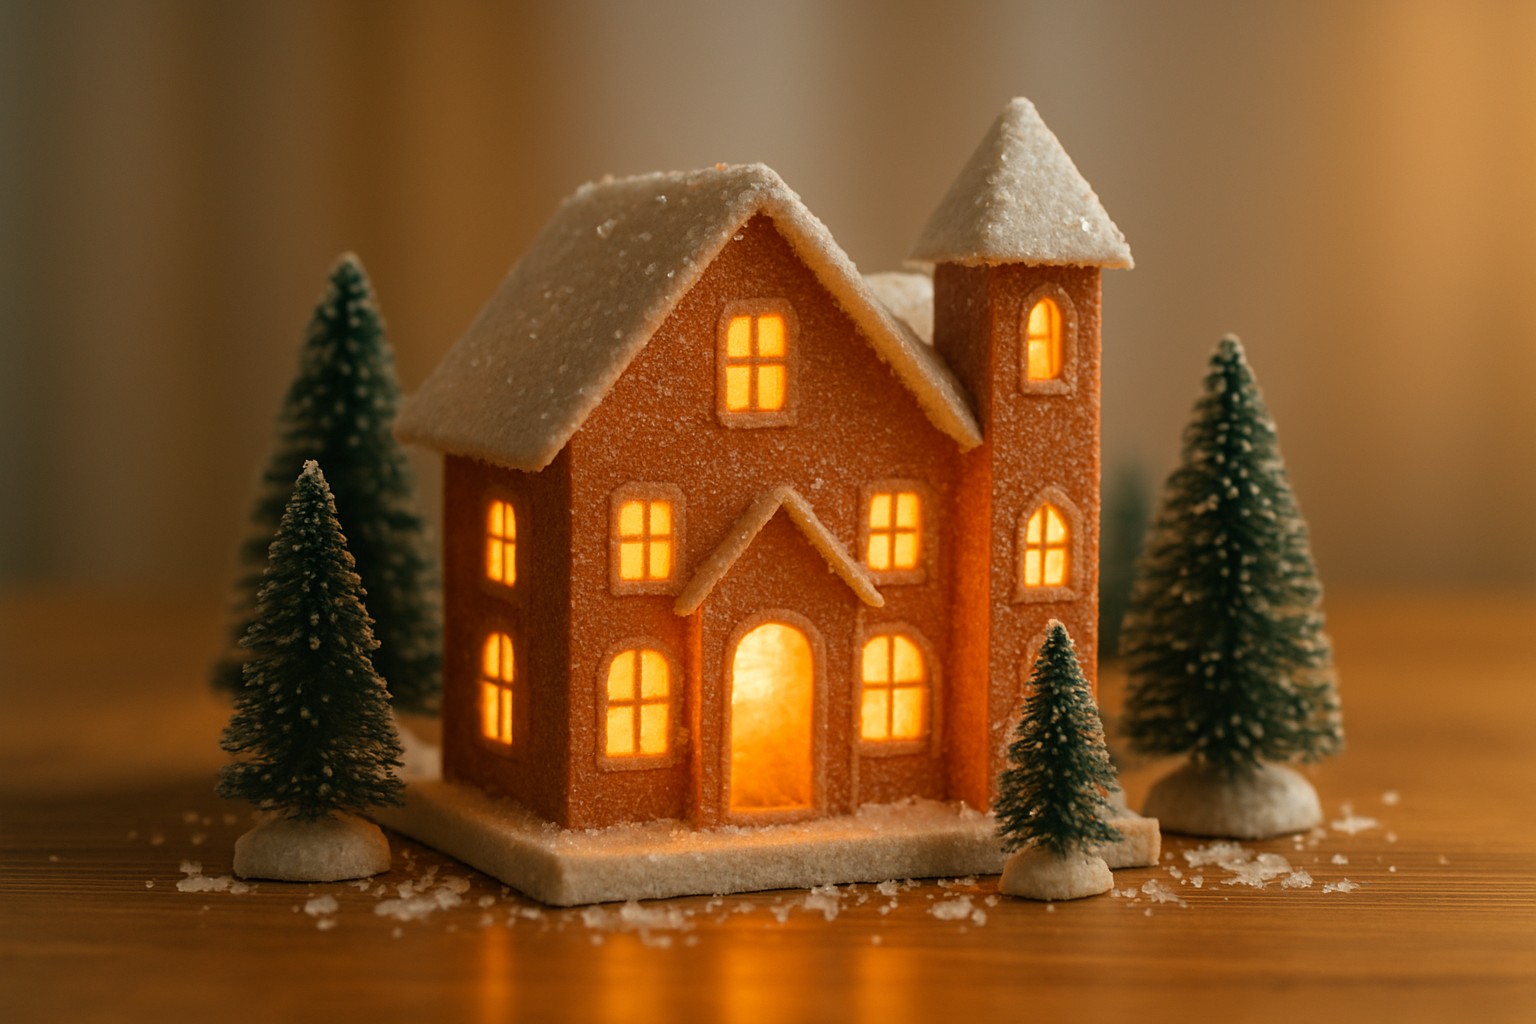
Putz houses are those charming little Christmas decorations that really hearken back to vintage holiday traditions. Originating from early 20th-century Pennsylvania Dutch communities, they boast detailed craftsmanship that’s honestly quite impressive. These miniature houses often bring a cozy sense of warmth and nostalgia, making them a delightful holiday craft to both create and proudly display at home.
The vintage Christmas look with its gentle hues, well-loved textures and classic holiday designs transforms a simple putz house into a cozy keepsake that captures the warm charm of Christmases gone by.
Materials You’ll Need to Build a Vintage-Style Putz House (Because, Let’s Face It, Good Things Start with Good Stuff)
- Sturdy cardboard or thin plywood sheets to build the house’s backbone solid and ready to hold everything together
- Craft glue or wood glue that works well with delicate materials so nothing ends up sticky
- Sharp scissors and a precise craft knife for when cutting shapes feels like surgery
- Acrylic paints in soft vintage-inspired hues like faded red, gentle green, creamy cream and warm brown perfect for a nostalgic touch
- White paint mixed with mica flakes or fine glitter to channel that just-fallen snow magic
- Small decorative trinkets such as miniature pine trees, charming figurines and vintage-style trims to add personality
- Linen paper or scraps of vintage wallpaper samples for creating realistic wall textures that whisper stories
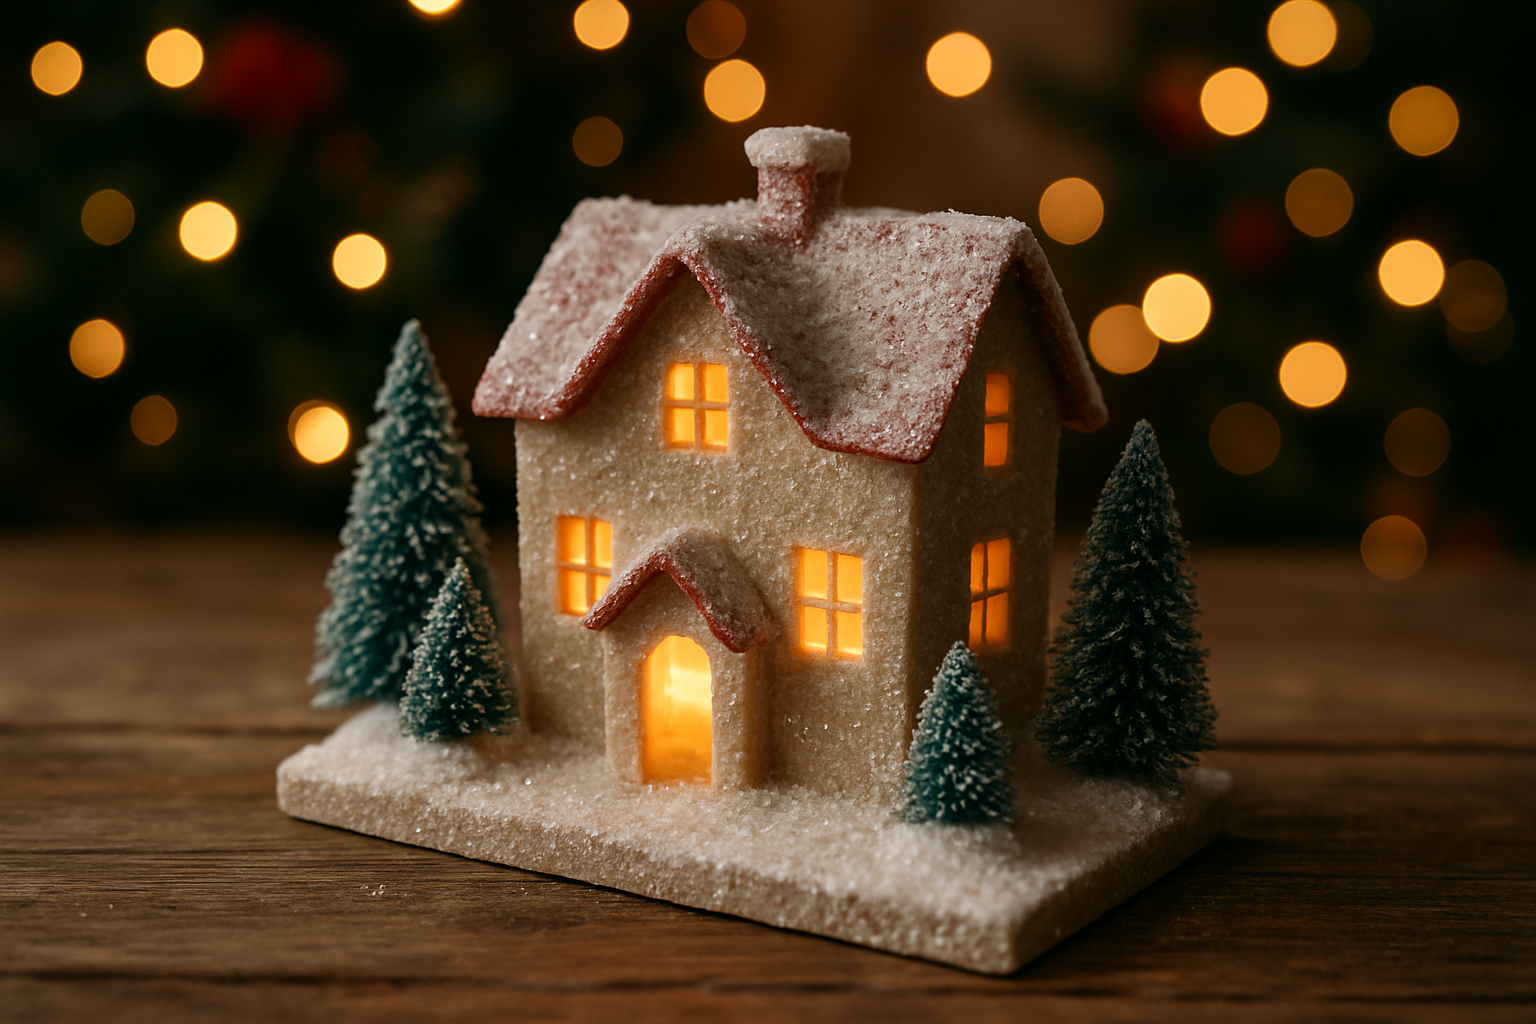
- Battery-operated tea lights or warm LED fairy lights to wrap the whole thing in a cozy inviting glow that makes you sigh
Using natural fibers like linen paper and vintage wallpaper scraps really brings a genuine aged texture to your putz house far from the slick and overly smooth feel you get with modern craft papers. Mica flakes create a charmingly authentic vintage snowfall effect that beats the flashy glimmer of glitter any day.
Step-by-Step Guide to Making a Putz House
Ready to roll up your sleeves? Let’s dive into the charming world of crafting a Putz house. Follow along, and by the end, you’ll have a delightful creation that’s bound to turn heads (and maybe prompt a few admiring murmurs).
Sketch your putz house design on paper keeping it simple with basic shapes like rectangles and triangles for the walls and roof. That classic vintage vibe usually calls for steep roofs and charming little windows.
Once you are happy with the sketch transfer the design onto sturdy cardboard or thin plywood. Take your time cutting out each piece—scissors or a craft knife work fine but precision here will save you headaches later.
Grab some craft glue to assemble the house frame. Hold the pieces steady with small clamps or a few cleverly placed weights and let everything dry completely—this patience pays off with solid stability.
When it’s time to paint go for soft muted base colors like weathered white gentle red or a deep inviting green. Make sure each coat dries fully before layering on the next—rushing this part is asking for trouble.
Add a bit of texture and charm by gluing linen paper or wallpaper samples onto the walls. Trim the edges carefully so they fit snugly and give your house that unmistakably handcrafted touch.
Paint the roofs crisp white then while the paint is still wet sprinkle some mica flakes or fine glitter to mimic freshly fallen snow—it’s a neat trick that really nails the vintage feel.
Get creative decorating with tiny touches like miniature pine trees a snowman or Victorian-style trims around the house to craft a truly festive little scene.
Pop in some battery-operated tea lights or warm LED lights inside so the windows glow softly casting a cozy inviting winter atmosphere.
Let your putz house dry completely in a safe spot then give it a thorough once-over and touch up any spots that need it—after all the devil’s in the details when it comes to perfecting your vintage holiday display.
Keeping things precise during assembly really plays a starring role in nailing that neat, vintage style. It’s a bit like threading a needle—cutting each piece carefully and letting every glued part dry to the bone before moving on helps dodge any annoying sagging or misalignment. If you’re just starting out, it’s a smart move to stick with smaller houses and fewer decorations to keep things manageable.
Ways to Sprinkle a Little Vintage Christmas Charm into Your Putz House
- Choose muted timeless holiday colors like cranberry, forest green and cream instead of bright neon tones that feel too flashy
- Add a touch of aged charm by gently sanding edges or giving paper elements a cozy tea stain to create a warm worn-in vibe like a well-loved heirloom
- Deck the halls with classic holiday motifs such as petite pine cones, holly clusters or delicate vintage-style wreaths that bring nostalgia
- Opt for soft lighting—think flickering LED candles or warm battery-operated fairy lights—that casts a gentle nostalgic glow perfect for quiet evenings
- Use vintage ornaments, trims or holiday ephemera from antique shops to add genuine authenticity and sentimental value as if each piece tells a story
Carefully layering vintage elements can really set the stage for a truly nostalgic vibe. Start off with muted colors and textured surfaces that whisper rather than shout, then sprinkle in small traditional motifs—just enough to keep things interesting without going overboard.
Frequent Challenges and Clever Ways to Tackle Them
Building a vintage-style putz house usually comes with its fair share of quirks—think delicate glue joints that seem to have a mind of their own, nailing an authentic aged look and securing tiny decorations so they don’t pull a disappearing act.
- Use clamps or small weights to keep glued pieces snugly in place while they dry. This trick helps strengthen delicate joints that tend to wobble.
- To achieve a convincingly aged look, try staining your paper with diluted tea or coffee. Then sand the edges lightly to give it worn charm.
- Tacky craft glue or hot glue work well for miniatures and hold everything firm without clumps or extra bulk.
- Carefully tuck battery-operated lights inside the house making sure they are far from the paper to avoid heat damage or discoloration because nobody wants a glowing mess.
Fresh Ideas to Make Your Putz House Truly Your Own
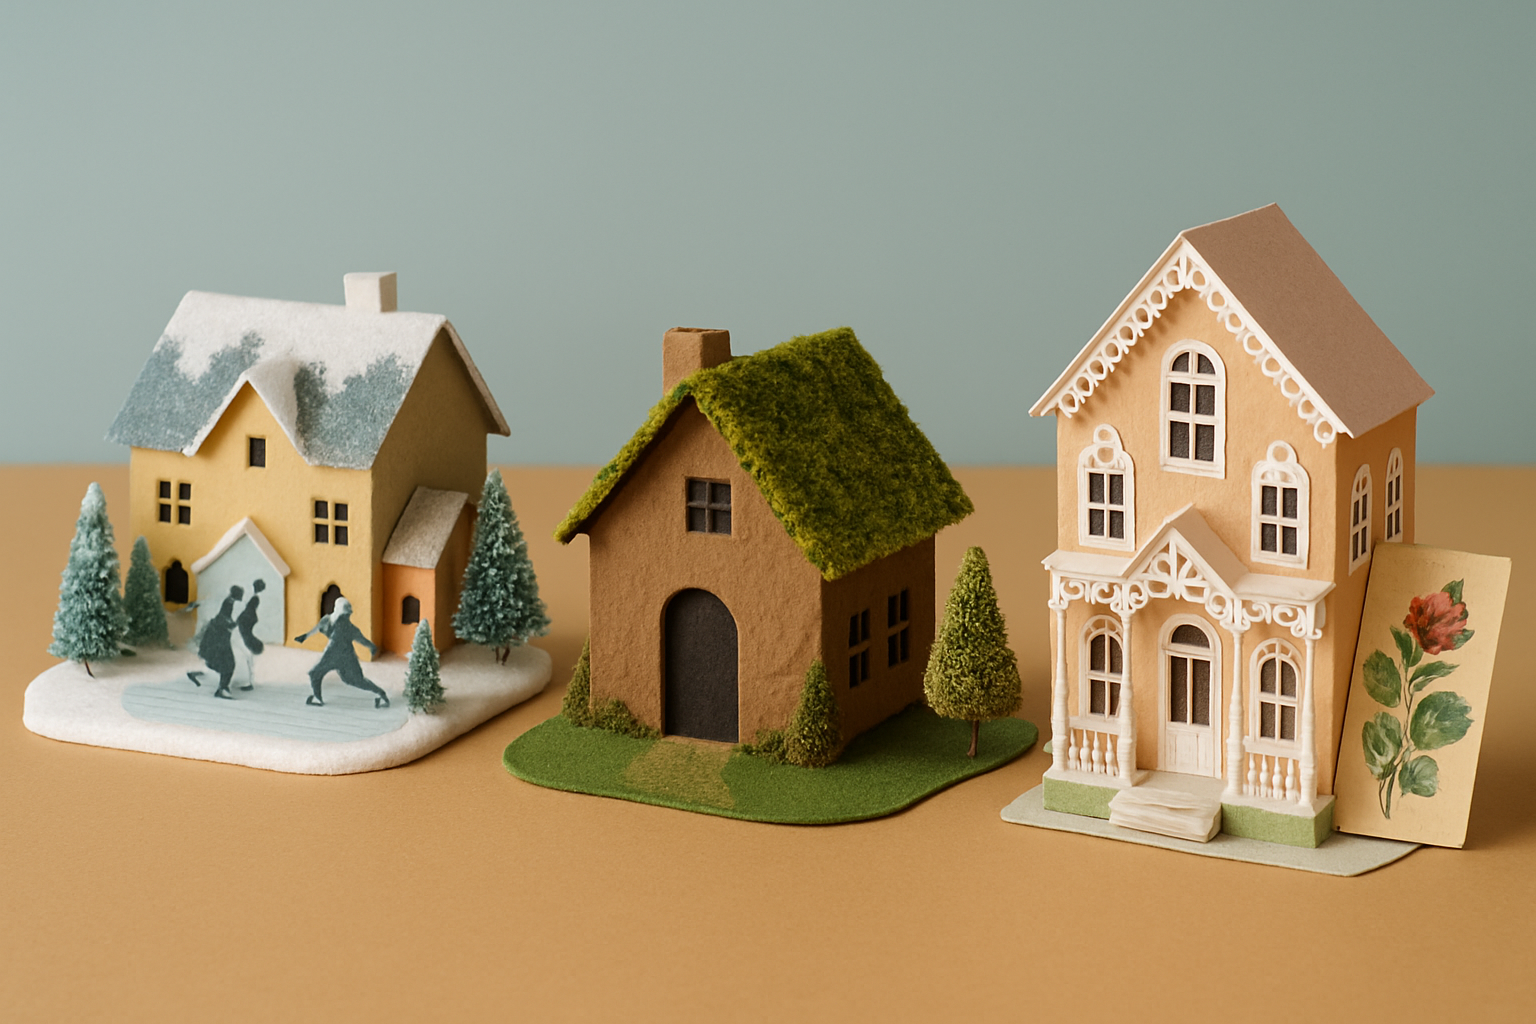
When you customize your putz house, you get to choose from a palette of holiday vibes. These range from a serene snowy village that feels like a warm hug to a cozy rustic cabin that invites you to curl up with a good book or a refined Victorian Christmas that whispers stories of old.
- Include themed miniatures like vintage sleighs, ice skaters or children gleefully playing in the snow to bring those scenes to life.
- Add natural touches such as twigs, moss or dried berries to lend a cozy rustic vibe that feels like a little woodland secret.
- Display vintage postcards, holiday cards or family photos as charming wall art inside the putz house windows—it's like peeking into a warm nostalgic world.
- Play around with color schemes from different eras like soft 1950s pastels or the rich gold and emerald tones of the 1920s to create an atmosphere that is truly one of a kind.
How to Show Off and Safely Stash Your Putz House
To keep your vintage-style putz house looking its absolute best and really let its charm shine through, make sure to place it somewhere out of direct sunlight and treat it with a bit of TLC when storing it away.
- Show off your putz house proudly on mantelpieces or shelves, or tuck it safely under glass cloches to keep it dust-free and out of reach from curious little fingers.
- Keep it out of direct sunlight to avoid paint fading or the paper turning yellow over the years.
- When it’s time to pack up for the off-season, wrap delicate pieces in acid-free tissue paper and nestle them into sturdy boxes so they stay snug and sound.
- Every now and then, give the battery lights a quick once-over and swap out batteries when needed. Keep an eye out for wear or damage before you tuck everything away.