How To Hang Gallery Wall Grid Evenly And Securely?
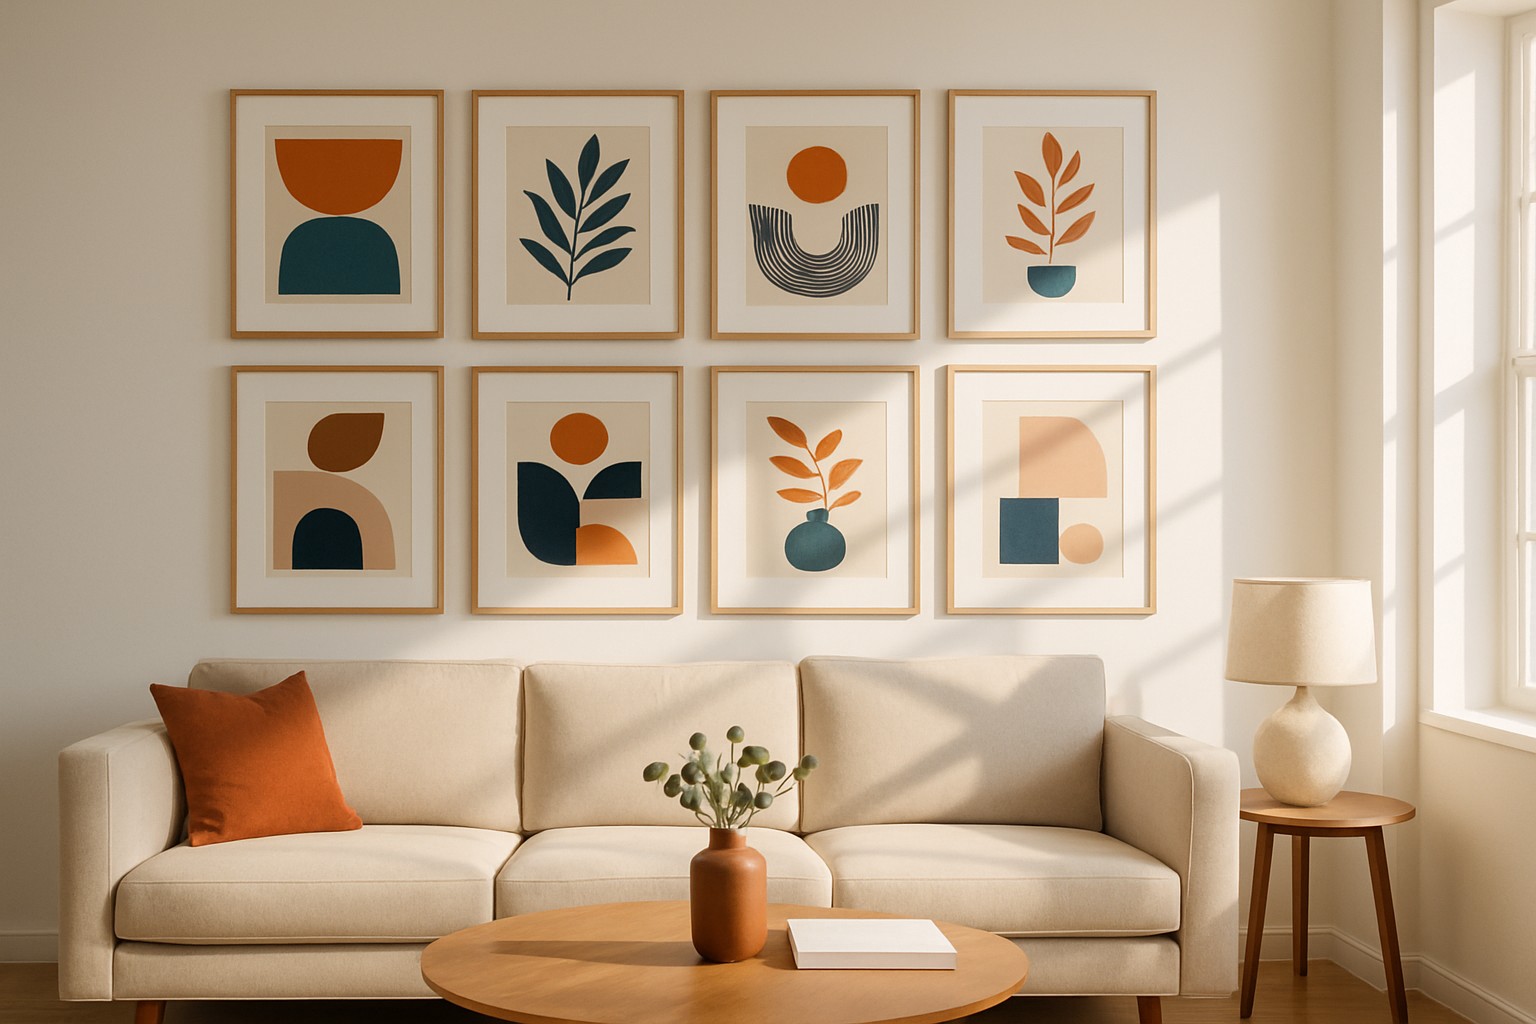
Setting up a gallery wall grid is a fantastic way to showcase your artwork, photos or decorative treasures with a crisp modern vibe. Nailing the spacing just right and making sure everything is hung securely are the secrets to that polished professional look most individuals want. If your pieces end up uneven or not mounted properly, it won’t just throw off the whole aesthetic—it might even leave your wall or the grid worse for wear.
Understanding Gallery Wall Grids and Why They Matter (and Why You Might Actually Care)
A gallery wall grid arranges art or photo panels in a neat and evenly spaced pattern. It steers clear of the laid-back vibe you might find with a typical gallery wall setup. These grids often rely on metal or wooden panels, wire frames or modular square racks to hold artwork or photos you can swap out without breaking a sweat. They bring a clean minimalist charm to the space and make it easy to shuffle pieces around whenever inspiration strikes.
What You’ll Actually Need to Pull Off a Gallery Wall Grid
- A measuring tape to nail down exact distance and height measurements without guesswork
- A trusty level because nobody wants panels that look like they’re doing the limbo horizontally or vertically
- Pencil in hand for gently marking drill spots and sketching guidelines on the wall
- Wall anchors to beef up support when you are dealing with less-sturdy drywall or plaster surfaces
- Screws or picture hooks to make sure your grid panels stay put and don’t disappear
- A stud finder to track down elusive wall studs for a rock-solid secure mounting job
- Hammer or drill to drive in screws and anchors like a pro
- Protective pads or bumpers to save your wall from scratches lurking behind the grid panels
Picking the right tools and materials really comes down to the type of wall you are dealing with and just how beefy your gallery wall grid happens to be. Heavier metal grids usually cry out for sturdy anchors or mounting right into studs if you want them to stay put and not do their best impression of the leaning tower. Drywall tends to play nice with plastic or metal anchors, while concrete or plaster often demands the tougher touch of masonry anchors.
Getting Your Wall and Gallery Grid Ready for Hanging (Let’s Get This Show on the Wall)
Start by giving your wall a quick once-over with a dry or slightly damp cloth to sweep away any dust or stray bits that could mess with your mounting plans. Next up, nail down what kind of wall you are dealing with—drywall, plaster or concrete—because choosing the right anchors and screws upfront is the secret sauce for a grip that sticks around for the long haul.
Give each gallery wall grid panel a good once-over to catch bends, scratches or quirks that sometimes sneak in during manufacturing. Lay out all the panels on the floor in the exact pattern you’re aiming for. This trick helps you eyeball the spacing and alignment so nothing feels off once it’s up on the wall.
Step-by-Step Guide to Hanging a Gallery Wall Grid So It’s Even and Secure (Because Nobody Likes a Crooked Frame)
Measure and mark the height and placement you want on your wall using a trusty pencil and measuring tape. It helps to pick a clear point as your reference—think a piece of furniture or the floor—so your marks do not end up all over the place.
Next, lightly sketch horizontal and vertical guidelines on the wall with a level. These lines keep your grid spot-on straight and save you from any unwelcome lopsided surprises.
Grab a stud finder to locate the wall studs for your mounting points. These usually provide the sturdiest support, which is important if your grid is on the heavier side.
Mark the drilling spots on those guidelines where you will attach the mounting brackets or hooks for your gallery wall grid.
Drill pilot holes at those spots. If you don’t hit any studs, just use wall anchors that match the weight of your grid to keep everything secure.
Firmly screw in the screws or hooks into the holes or anchors. Double-check your level alignment as you go along. A little extra care here saves headaches later.
Now, carefully hang your gallery wall grid panels on the screws or hooks, making sure each piece fits snugly within the overall grid. It’s like fitting puzzle pieces together but with a little more flair.
Take a moment to adjust each panel’s position as needed. Keep an eye out for even spacing and perfect leveling because nobody wants a crooked gallery.
Pop some protective pads behind each grid panel to ward off scratches or accidental wall damage—your future self will thank you.
Finally, do a thorough once-over on all the panels to ensure every grid is securely mounted and nailed the alignment game.

Getting your marks just right is absolutely key when it comes to building a neatly aligned gallery wall grid. To dodge any rookie mistakes, I’ve found that using a pencil with a sharp fine point really helps with precision. Also, keep your measuring tape pulled tight—don’t let it sag like it’s had a long day. Always double-check your measurements before you start drilling.
Common Challenges and Clever Ways to Tackle Them
- Dealing with uneven or textured walls that keep you on your toes when leveling
- Tracking down studs in walls where the framing seems wild
- Keeping grid lines straight even on walls with bumps, wallpaper or textured paint
- Choosing anchors strong enough to hold heavy metal or large gallery grids
- Securing hefty panels carefully while avoiding drywall or plaster damage
When dealing with uneven or textured walls, it is usually best to rely on a laser level or snap chalk lines to nail down more dependable guidelines. Stud finders that detect both wood and metal studs can really take the guesswork out of locating those tricky mounting points. For heavier grids, heavy-duty anchors like toggle bolts or molly bolts do a solid job of safely spreading the weight around.
How to Style and Care for Your Gallery Wall Grid (and Keep It Looking Sharp)
Carefully arranging artwork on your gallery wall grid can really amp up its visual impact. I’ve found that balancing bigger and smaller pieces gives the setup a lively dynamic feel and mixing different frame styles adds depth that keeps things interesting. Throwing in simple touches like minimalist shelves or soft warm lighting can subtly elevate the display without making it feel over the top.
- Mix different sizes and color schemes to create balanced compositions that catch the viewer's eye and keep them hooked
- Use a variety of frame styles like wood, metal or colorful frames to add texture and personality that tells its own story
- Refresh the artwork regularly with seasonal pieces or fresh photos to keep the display lively and inviting so it never gets stale or predictable
- Clean grid panels gently with a soft non-abrasive cloth and avoid harsh chemicals that might harm those surfaces